Everything About My Honda Element Camper Conversion
By Ethan Maurice | January 22, 2018
It took almost a month, but I have finished converting my Honda Element into a tiny home on wheels!
As someone who works seasonally and uses the majority of their year to travel, read, and write, the nomadic "van life" has always appealed to me. With no rent to pay, the ability to move home anywhere at any time, and the resulting focus of such minimalism, I intend my near future to be a rare combination of adventure and productivity.
Why an Element?
Because, it's the ultimate adventure-mobile:
The tall, boxy shape means more livable space and headroom.
It's urethane coated walls and floors are super easy to clean.
The rear hatch/tailgate combo creates an ideal mobile kitchen space.
The rear moonroof lends an unprecedented feeling of openness and light.
It goes twice as far on a gallon of gas as a van in my price range would.
Nobody expects you to be sleeping in an Element (great for stealth camping).
I'm weird and think it looks super friggin' cool.
Honda discontinued production of the Element in 2011. But for the reasons listed above they've gained an almost cult following, now highly sought after cars of outdoor lovers.
After a couple weeks of unsuccessfully searching for the right one, I flew out to Burbank, CA to buy a well cared for 2003 Honda Element with 98,000 miles and drove back to Phoenix to begin my conversion.
The entire build process took a bit less than a month, here's the result:
How to Build Your Own Honda Element Camper Conversion:
First, a couple things to note.
As with all first-time construction projects: however long you think it will take, triple that number—that's a good ballpark estimate. I expected my conversion to take 7-10 days, it took almost a month.
This is not a simple "measure and cut" build. The inside of a car is contoured and has different dimensions at different heights and recessed windows and lots of other fun complications. Your solution: cardboard. Custom cut whatever you're working on in cardboard first, get it right, then trace it onto your actual wood piece and cut. You will do this a lot.
What follows is a general guideline for turning your Element into a badass, functional home on wheels. There are many tiny problems that I won't dive into here, like screwing your cabinet door's roller latch in at just the right height and depth that will infuriate you and require hours of agonizing over something that seemed so incredibly trivial. You'll have to solve these issues on your own. However, I promise, with gumption and knowledge that your Element will be the ultimate adventure-mobile when you one day finish, you will persevere.
Preparations:
1. Find a couple big cardboard boxes. Bicycle shops usually have a few lying around they'll happily give away. As I mentioned earlier, you'll custom cut cardboard first to get a piece just right, then trace the cardboard onto actual wood afterward.
2. Remove some stuff. If you're following my build, the rear seats, the metal bar on the passenger side wall that the rear seat attaches to, and the driver's seat armrest must go. Store all that stuff in a place you can find it for when your days of roaming in your Element come to an end.
3. Get tools. Here are the ones I used:
Jig Saw (absolutely vital saw for all the custom, curved cuts)
Regular Saw (not necessary, but cuts straighter than the Jig Saw)
Drill (With both drill bits and screw bits)
Line Level (& 6ft of String)
Tape Measure
Screwdriver
Paintbrushes (Could get away with one, I'd grab four or five)
Big Scissors (To cut cardboard and Reflectix)
Scissors (To cut fabric for window shades)
Box Cutter (For cutting foam mattress to fit)
Permanent Marker
Pencil
Disclosure: Some of the links in this article are affiliate links. At no additional cost to you, I'll earn a commission if you click through and buy something.
The Platform Bed:
Supplies Used:
4 x 8ft Quality Sheet of Plywood (I used Red Oak, 5/8" thickness, from Home Depot)
(3) 1in x 16in x 8ft Boards (mine were "glued finger joint pine boards" from Lowes)
Wood Stain (32oz)
Polyurethane Coating (32oz)
Large Screws (mine were 1.5in, thinner is better so as to not split wood)
Small Screws (just short enough to not poke through plywood)
Smooth Grain Sanding Paper
(4) 3in Hinges (2 for Bed Extension, 2 for Folding Table)
(20ish) 1.5in L-Brackets
Dimensions:
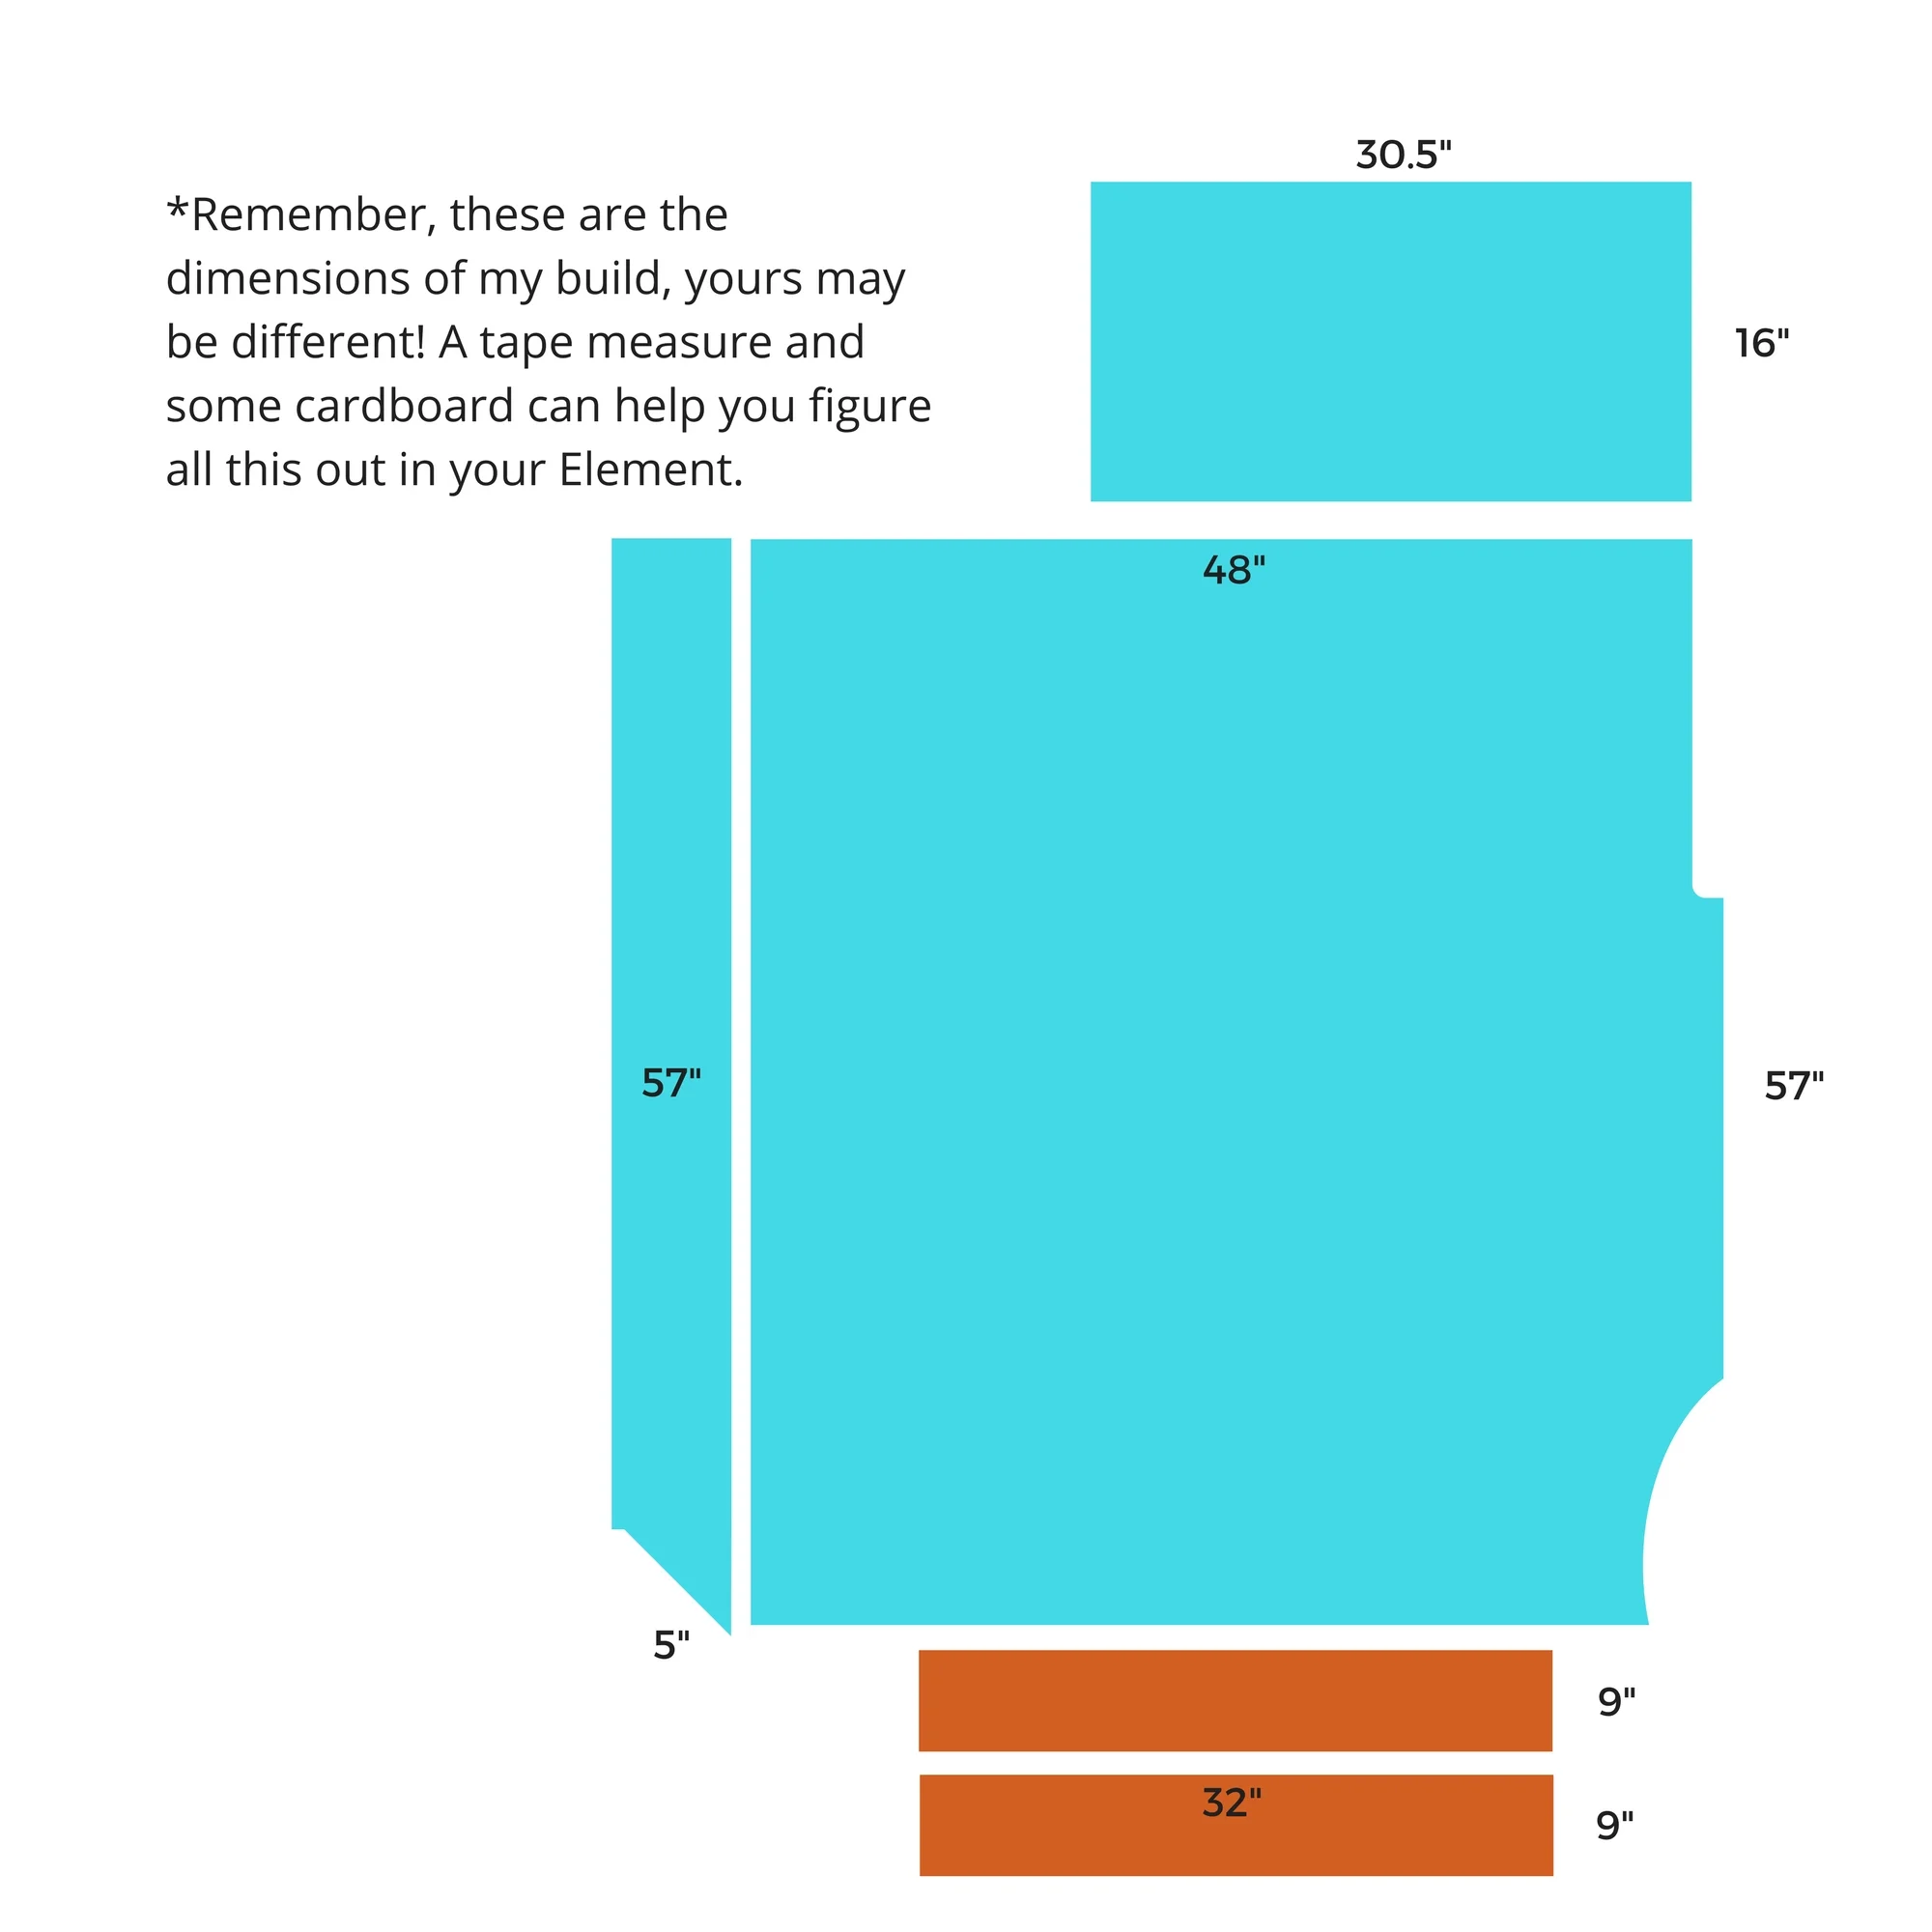
A Couple Notes:
The height of your platform bed should be based on two things: what you want to fit under it and how unlevel your floor is (different heights in front and back). To level your bed: Grab a line level and string, park on a flat surface, hold line down on highest side of floor, lift line at other side up until level, and measure that height. The bed should be that much taller on the lowest side.
The spacing of storage under bed should be based on what you want to fit under it. For example, I made one compartment slightly larger than the rest to fit a milk crate with all my kitchen stuff.
The Cabinet:
Supplies Used:
4 x 8ft Sheet of Plywood (I used 1/2" thick, not enough leftover from platform)
Should have enough Stain, Polyurethane, Screws, L-Brakets and Sandpaper leftover
(2) 2in Hinges (for foldout table/door)
(2) 1in Hinges (for other door)
A Sturdy Latch (to close table/door)
Cabinet Roller Catch (for other door, magnet-style might be easier to install)
String/Twine (to support table/door)
Non-Skid Shelf Liner (so your stuff slides around less when driving)
Dimensions:

*Once again, these are my dimensions! Yours may vary.
The Electrical System:
Here's a whole article about making stealth, insulating window shades.
Outfitting Your Element:
Bed
Memory Foam Mattress (full-size, thin as possible for more space, I love this one)
Twin Duvet (covers whole bed as it doesn't need to hang on sides)
Twin Duvet Cover (easier to wash this way)
Sheets (full-size as a twin fitted sheet would be too small)
Sleeping Bag (I also carry a 20-degree sleeping bag for super cold nights)
Kitchen
(2) 1lbs Green Propane Bottles
Green Propane Bottle Caps (lower the odds of a propane leak)
Cast Iron Pan (don't have to clean as much as normal pan)
All the other kitchen items you want (a milk crate holds it all well)
The Final Product:
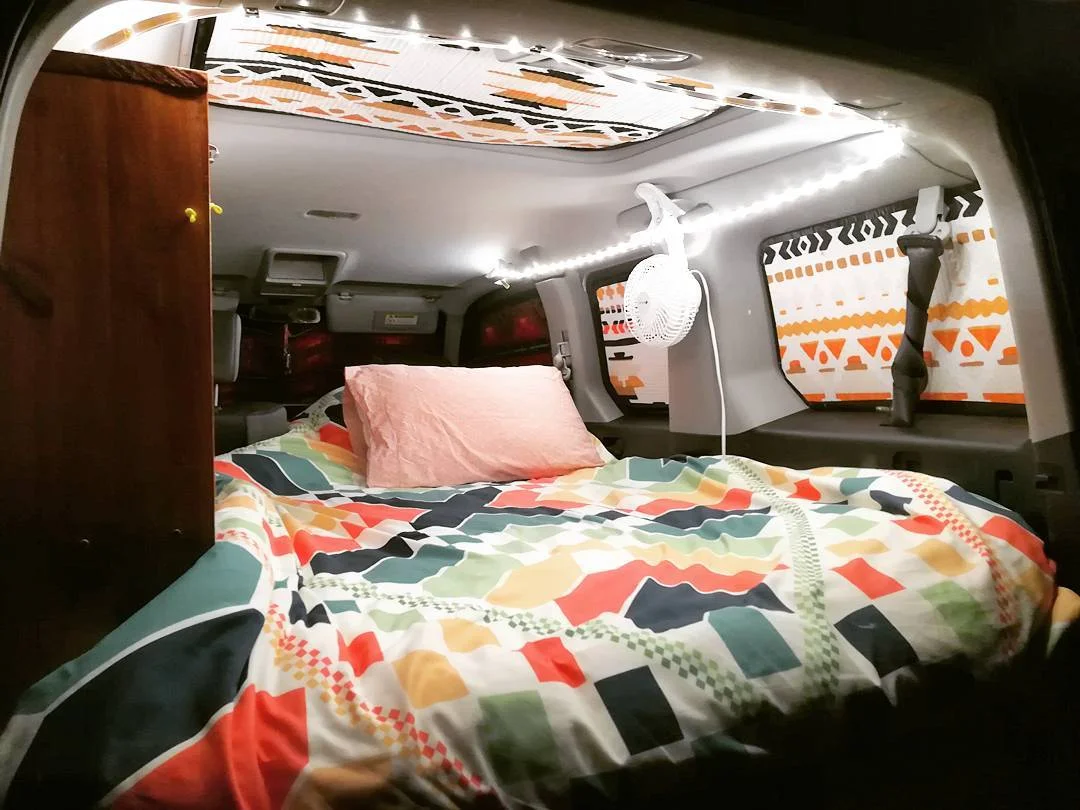
Well, that's all I've got.
May your build go smoothly! And may your travels be cheap, adventurous, and riddled with serendipity.